

If you haven't done so already, import your Ots video files into OtsAV's Media Library.
All video based items within the Media Library can be identified by a V in the Att. column in all list and search areas. Drag a video item into a Deck, and press play.
You can drag additional video items into the playlist, and they will play just like conventional audio items, using OtsAV's intelligent automated mixing process.
If you cannot see any video clips being played, either on your PC monitor, or on your 2nd display (TV), ensure you have set the Video subsystem to launch when a video item is played, using the menu selection...
Options -> Video/CD+G -> Auto Enable Video Subsystem -> On-Demand
Tip: The Options -> Video/CD+G menu options can also be accessed by right-clicking your mouse on the middle video display, when they are visible. This is the suggested method, as it is the quickest way to access the Video/CD+G features.
Change the Aspect Ratio of OtsAV to suit the aspect ratio of your 2nd display.

If you are using a widescreen TV (16:9), such as a Plasma or LCD, you should use the following setting...
Options -> Video/CD+G -> Aspect Ratio (TV Display Format) -> 16:9 (Widescreen)
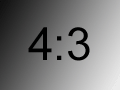
If you are using a legacy TV (4:3), or older projector, you should use the following setting...
Options -> Video/CD+G -> Aspect Ratio (TV Display Format) -> 4:3 (Legacy)
OtsAV will always play your videos in their original aspect ratio. This means that you will never see stretched or compressed images on your 2nd display, providing you have set the correct Aspect Ratio for your 2nd display. OtsAV can use ARC (Aspect Ratio Control) Embellishments to "fill" the additional display area.

4:3 video on a 4:3 display 4:3 video on a 16:9 display

16:9 Video on a 4:3 display 16:9 Video on a 16:9 display
The final step is to set the resolution (picture quality) of your second display. If your video collection is in DVD (SD) quality, set the Internal Resolution to Standard Definition (SD), by selecting...
Options -> Video/CD+G -> Internal Resolution -> Standard Definition (SD)
Tip: For even higher output video resolution (quality), select Enhanced Mode under the Options -> Video/CD+G -> Internal Resolution menu.
If you are using optimized video clips, select...
Options -> Video/CD+G -> Internal Resolution -> Optimized Definition (Recommended)
Tip: Both SD and optimized video files will play using any Internal Resolution setting. The Internal Resolution setting should be matched to the power of your computer. ie. Use Standard Definition if your computer meets the recommended system requirements.
There are a number of additional features that can be enabled/disabled in OtsAV. You should consult the Video Help section in the OtsAV documentation to learn more about using these features.
That's it! Now have some fun scratching and mixing your video clips like never before. If you don't know how to play songs or video within OtsAV, see here.