| Ots Studio |
Video clips can be recorded in different sizes. Some clips look "square" (4:3), and some have varying rectangular formats (14:9, 16:9, etc.). This is known as the Aspect Ratio (AR) of the clip. DVDs themselves can be mastered in different Aspect Ratios also.
If watching a DVD on a 4:3 television, a number of things can occur...
4:3 clips on a 4:3 encoded DVD 16:9 clips on a 4:3 DVD will produce black
will fill the entire display. bars at the top and bottom of the display.
If watching a DVD on a 16:9 (Widescreen) television...
4:3 clips on a 4:3 encoded DVD will produce 16:9 clips on a 4:3 DVD will fill the entire display.
black bars at the left and right sides of the display.
Other video playback software doesn't take Aspect Ratio into consideration, resulting in stretched and compressed video playback on your 2nd display. Ots Studio automatically determines the correct Aspect Ratio of every converted video file. This information is used within OtsAV to produce correctly sized video output of the video being played.
In most cases, you will never need to adjust the Aspect Ratio of the video. If you need to make changes, you can do so, in a non-destructive manner.
Below is a screenshot of the VCI Aspect Ratio Settings window. Click on each section of the image to learn more about each function.
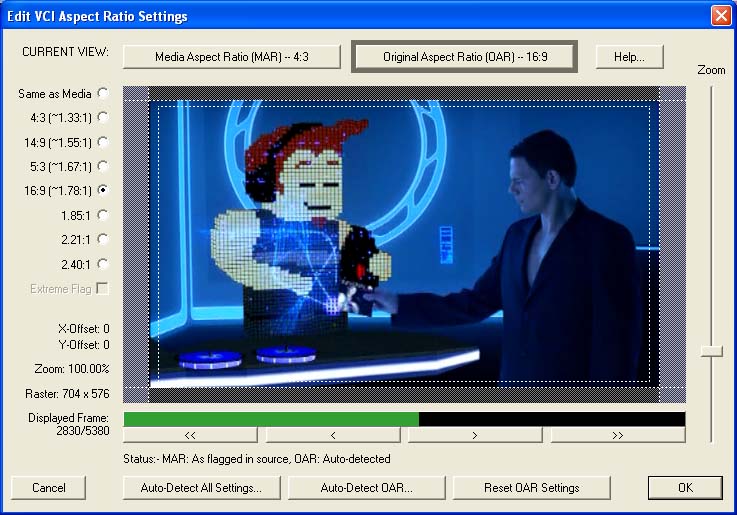
CURRENT VIEW
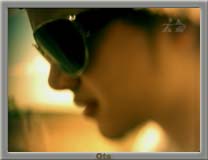
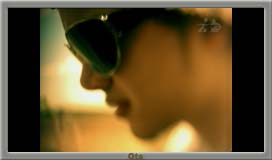
Media Aspect Ratio (MAR): The Aspect Ratio determined from the DVD (Media). Clicking on the MAR button will display an image of what the video would look like if played on a TV that matched the Aspect Ratio of the originating Media. The screenshot above is showing that this clip came from a DVD mastered in 4:3 Aspect Ratio.
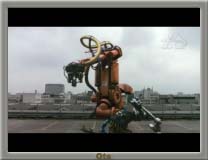
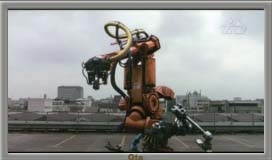
Original Aspect Ratio (OAR): The Aspect Ratio that the video was originally recorded in. In the example above, the clip is actually recorded with an Aspect Ratio of 16:9 (Widescreen). Ots Studio automatically determines the correct Aspect Ratio for each video during the conversion process.
To change the Aspect Ratio of the video, select the appropriate Aspect Ratio from the listing of Aspect Ratios on the left hand side of the VCI Aspect Ratio Settings window.
If you can see black bars within the flashing dotted box (in the main window), you can zoom the video in or out as required. The flashing dotted box indicates the Overscan area of the video. Any video content outside of the Overscan area may not be seen on your 2nd display.
The entire video image can be moved up, down, left, or right, by clicking on the main image with your mouse, and dragging to the required position.
When adjusting any settings within the Aspect Ratio area, it is important that you only make adjustments that would suit the entire video. For example, some videos may begin with black bars around the main image. Further into the video, the image actually takes up the entire screen. You wouldn't crop the video to suit the just the beginning of the video. Use the seek bars to quickly scan through the entire video, to ensure your changes are appropriate.
Tip: If you make any changes to the Aspect Ratio, you can go back to the original settings by selecting Auto-Detect All Settings..., Auto-Detect OAR..., or Reset OAR Settings...
How to choose the De-interlacing method
Adjusting the First and Last viewable video frames